
Your Songscore account includes a very powerful email engine, which we’ll be exploring in our next couple of blog posts. This first post is about template tags, which can be hard to get right the first time. The main reason is that often text is formatted, so if you write your newsletter offline then paste it online, it can carry over some formatting that will break the tags. Here is a guide that might help.
Also, according to CAN-SPAM act your emails should be unsubscribe compliant and must have unsubscribe links with working mechanism for all the emails and your system must process the request of opt-out within 10 business days. In our case, Songscore does this instantly, as soon as a subscriber hit “Unsubscribe” button/ link from their email. But, to make this work efficiently, your email must have this link correctly placed.
Here is how you can correctly add Unsubscribe and Webversion links to your email template. In this particular example, I am going to add these links in footer of email template.
Before we should start with this tutorial, I must mention that you can easily find these Unsubscribe and Webversion html links / tags below the email campaign editor in Sendy. This looks something like this:
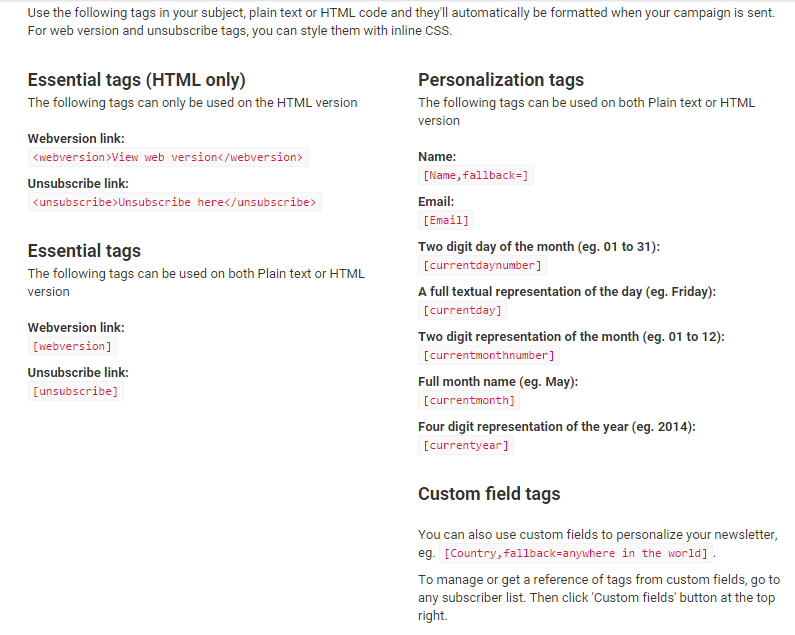
Adding Unsubscribe Link Tag in HTML email:
In order to add unsubscribe link in an email template, you can add [unsubscribe] in HTML editor, as shown in screenshot below:

After, you add this tag in HTML mode of the email, this tag automatically convert into link, when you send this email to the subscribers. Also, you can have a look at the converted link in test mode, as shown below:

Adding Custom Unsubscribe Link in Email Template:
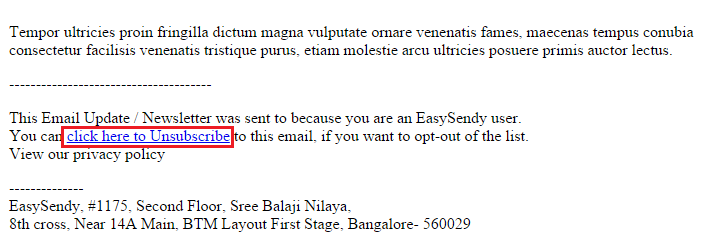
Above mentioned tips are very easy to use and your email subscriber will receive a naked link in email asking them to click on the link to unsubscribe. But, this is always not the case, we want to make the email look simple and user friendly, adding a clickable link with call to action can be of great use. For example, in this case, I want this unsubscribe link to look like, “Click here to Unsubscribe”.
In order to do this, we will have to switch the email editor to HTML editor, to do this, click on “Save and switch to HTML editor” button.

After you are done with changing the editor to HTML mode, you will see html codes in editor. Then, you need to add Unsubscribe HTML code to the right position, where you want the link to appear, “<unsubscribe>Click here to Unsubscribe</unsubscribe>”, inside the HTML mail, as shown in screenshot below:

Once you are done and when you will switch back to WYSIWYG editor, then you will observe that, the link to unsubscribe does not appear, but, don’t worry about this. The dynamic code has been added to your email in HTML mode.
You can see this link working in test mode, also, this link will dynamically work when the email campaign is sent:
Now, you are done and you can start sending email campaign to your subscribers.
(this guide adapted from EasySendy website)
